|
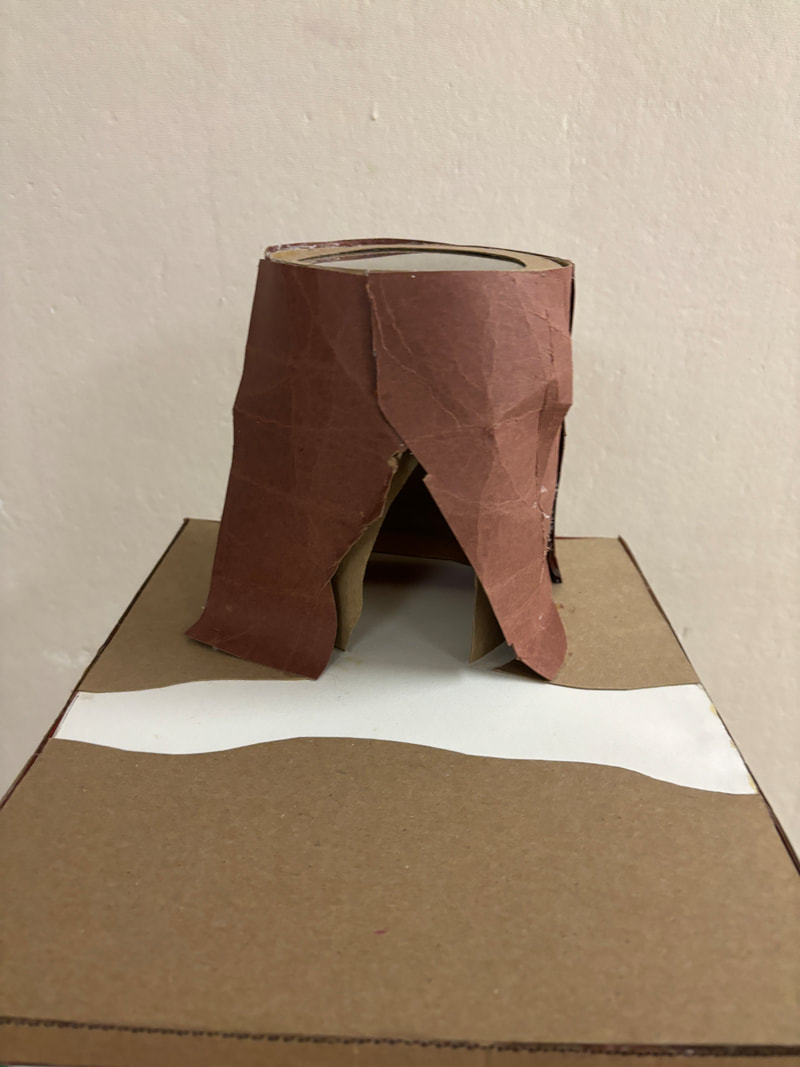
Tree Stump Rest Stop
|


|
Inspiration
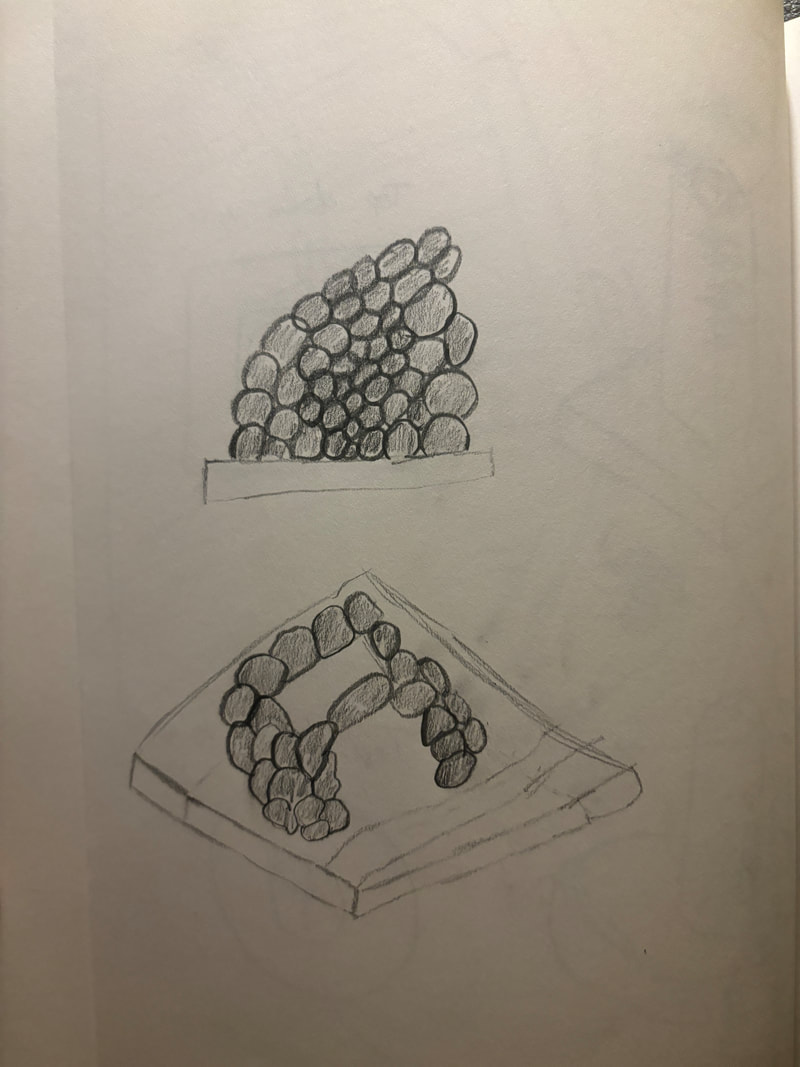
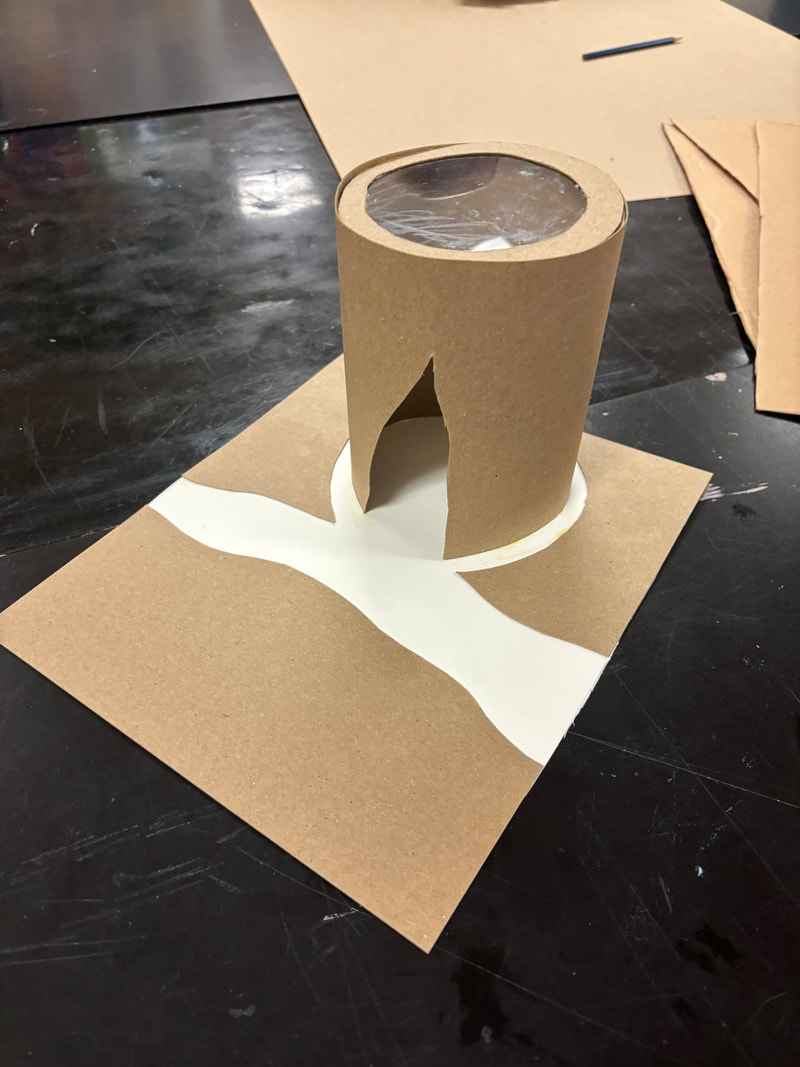
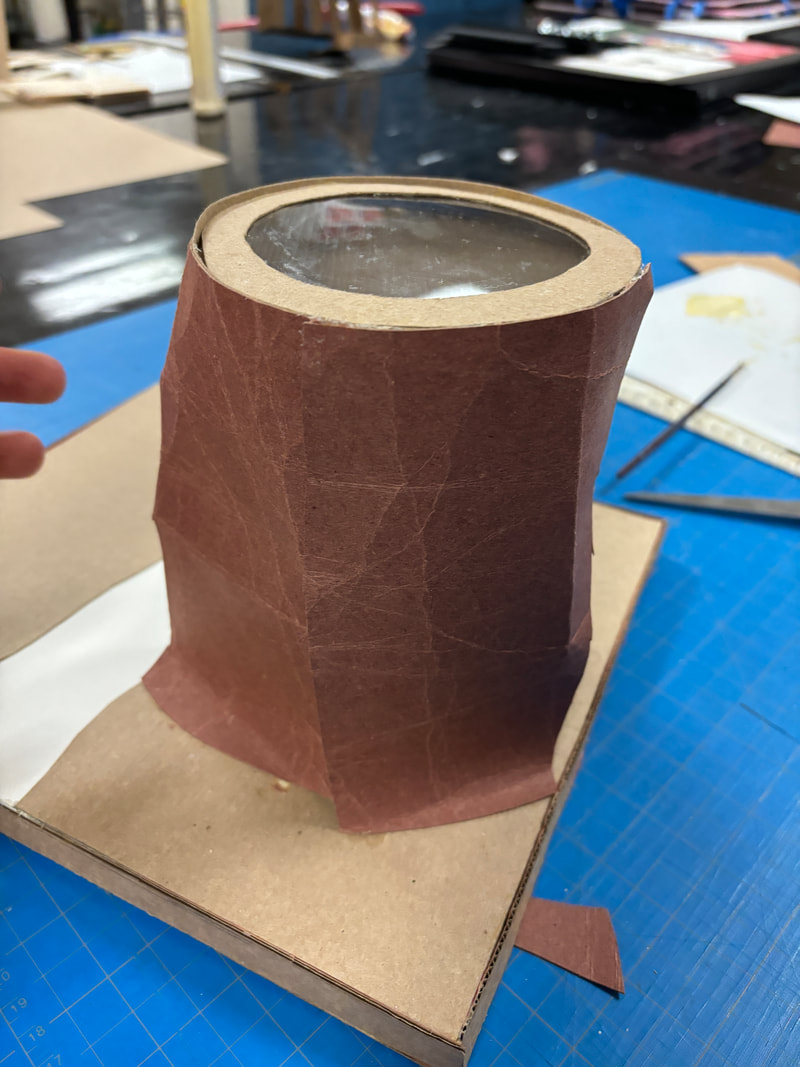
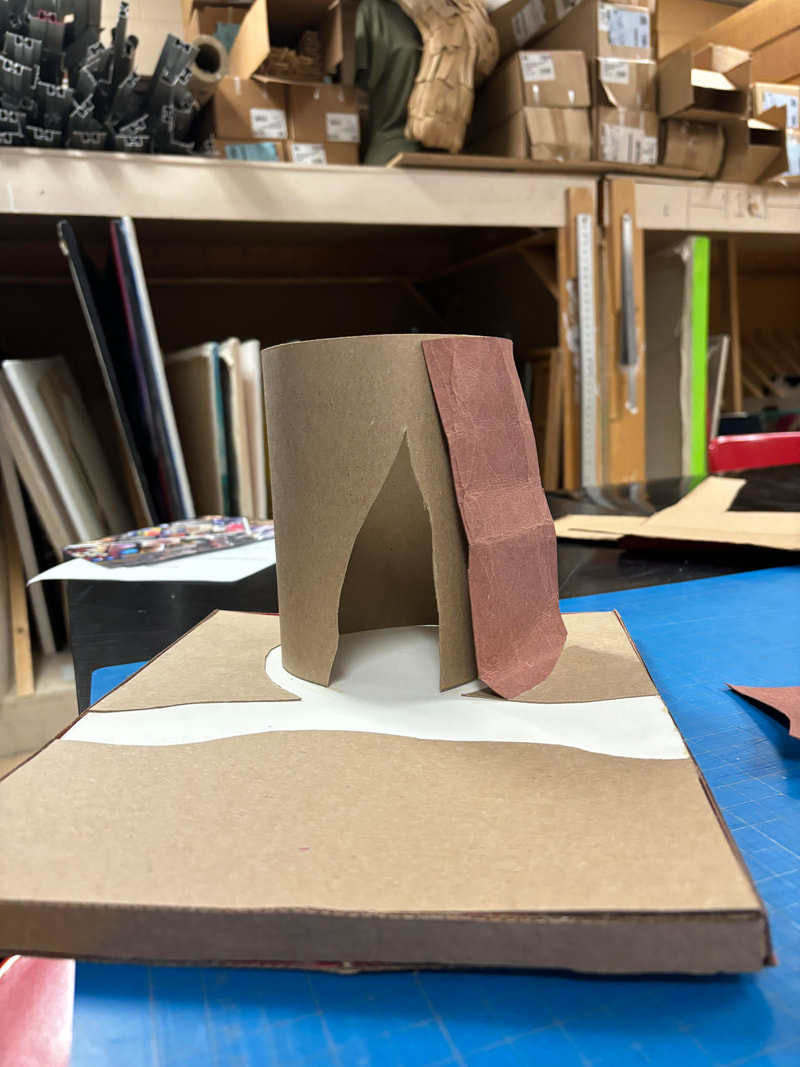
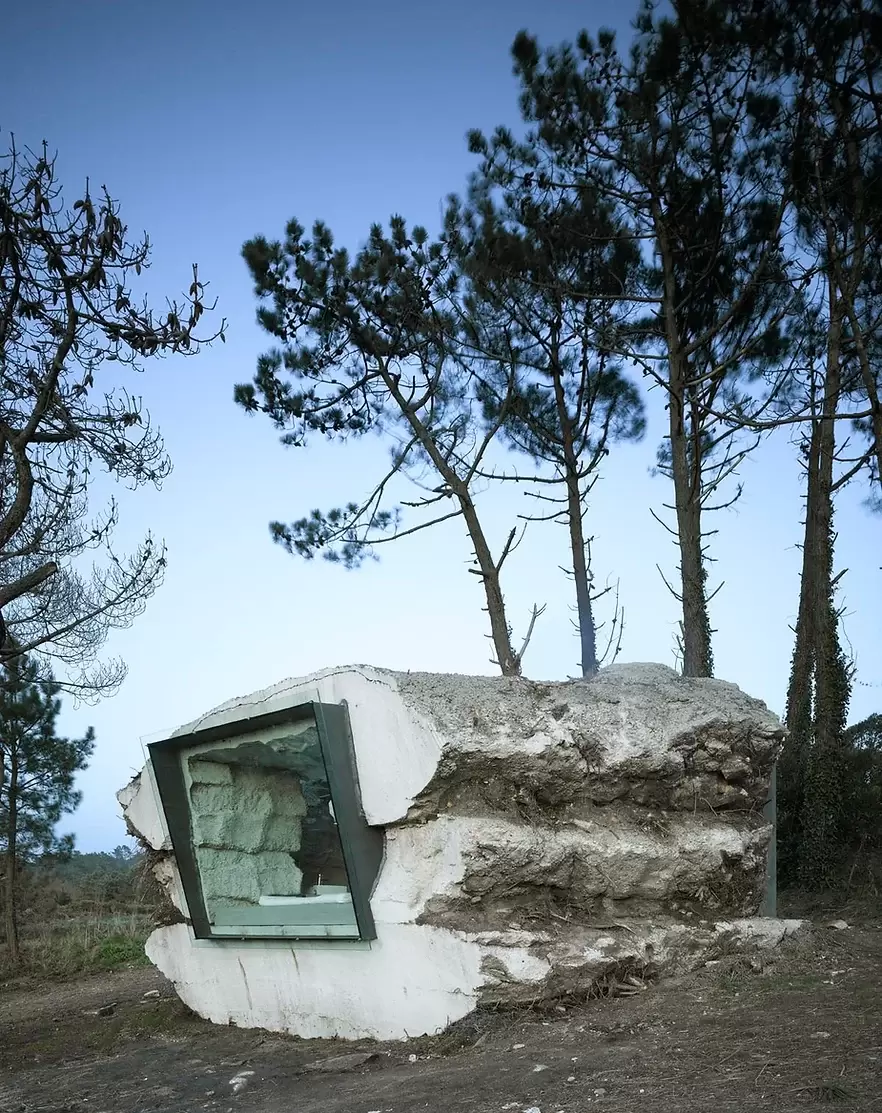
For this project as my inspiration I used The Truffle by Ensemble Studio. This project was created to blend in with the natural environment while also living inside this building. This building is created out of concrete which was formed around hay bales and dirt. This building was created stacking hay bales in a block shape and built up dirt around the hay block. After the dirt walls were built, concrete was poured in between the hay and the dirt. After the concrete dried the dirt walls were taken down and the hay was taken out of the concrete. After everything was taken down a bed and other home remedies were placed inside it which completed the project. When I first saw this project for the first time my eyes were immediately drawn to the rough texture that is seen on both the outside and the inside of the building. This interested me because most homes you see have smooth walls on the inside while also having siding on the outside. Another thing I found interesting about this building is how this building from most sides blends into the in which is why I picked it. I believe that the environment and people can live together which is one of the main concepts of this building. This connects to my theme of the environment because it shows how people can live with the environment without destroying it. Planning For this scale model I used the word organic because when I think of the environment I mostly think of the organic shapes that plants, animals and the climate as. This model reminds me of a cave of some sort of natural shelter.For my second scale model I used the word natural to make it. I used some flowers in a glass that was in my house for the base and decided to add a folded piece of paper for the roof. For my third model I used the word sustainable. I used this word because when I hear the word environment I think of sustainability with it. I created this model out of an old redbull can and turned it into a shelter for my mini me. After I made my three models I realized that I wasn't in love with one completely but I did like some components from each one. I liked the texture of the first model and how the second model was inside the environment while I like the overall shape of the third model. I took all of these aspects and try to combine them into sketches. I first started by making a stone structure like my inspiration with a glass on the roof to look out of which I liked but didn't think was original enough. I took the glass roof into my next sketch because I like the idea. After this sketch I knew I wanted to make a rest stop for hikers because it would connect to my theme of the environment. My next sketch would take all of the aspects of my three models and the glass roof and turn it into one. For this sketch I made a hiking rest stop that looked like a tree stump that would have a tree stump. I liked this sketch a lot which made me make a rough model to make sure that my sketch would be able to turn into model form. I created my rough model with cardboard because I liked how bendable it was and because I liked the brown color too. After I created my rough model, I knew this project was going to work and that this is what I wanted to do. Process I started my process with the glass ceiling because I knew it was going to be one of the hardest parts of the project. I started my ceiling by cutting out two rings out of card stock. The next thing I did was cut out a piece of plastic that would serve as my glass. I cut out the plastic into a circle which was a little smaller than the rings I wanted the rings to go over the plastic. After I had everything cut out I glued the two rings together with the plastic in between them to create the window that would serve as my ceiling for this model. After I had my ceiling complete, I cut out a piece of card stock which was 5 inches tall that was the length of the outside of the circle. After I had my rectangle cut out I glued the top of it around the ceiling. This was a challenge because it was hard to wrap the rectangle around the circle but how I got around it was gluing the edge of the circle and holding the rectangle around it until it was done drying. This worked because I was holding it together applying pressure which did not let it disconnect which allowed the glue to dry and keep it together. After I had my inner wall complete I cut a door out of the wall which would allow people to go in and out of my model. I cut it to make it look like it was part of the tree trunk and was made from humans. After I cut out the door my main structure was complete. My next step was to do my base which was also going to be one of my hardest parts of this project too. I started my base by cutting a piece of card stock at ten inch by ten inch. After I had my square complete, I cut a curvy line through near the middle of it. The next thing I did was cut a circle out of one of the sides of the parts of the square. After the I had all my cuts complete, I glued both pieces apart from each other with a white piece of paper underneath. I made my base this way because I wanted it to look like the location I was planning on putting my model if it came to real size. I wanted to create a base that deprecate where I was going to base my actual model. For my base I wanted to make it look like a hiking path with a little open area where I was going to put structure. After I finished the base I used wood glue into to put what I had of my structure so far, into the white circle of my base. After I had my top base complete and my structure was in the right place I had to make my base more stable. My plan to make my base more stable was to create a 3D rectangle card board. I started by cutting out a piece of card board that was a the same size as my top base. After I had my piece of card board cut out I glued both ,y card board and my base together. After I did that I created four walls that would elevate my model. I glued my four walls to the bottom of my base. After I glued the four walls I created another card board rectangle that was the same size as the base. Then I glued my second card board rectangle to the bottom of my walls which completed my base for this project. The next step I took was adding texture to my structure to make it look more like a tree stump. I did this by folding a brown piece of construction paper multiple times to make the paper look rough and textured. the next step was to get the wood glue at the top of the paper and then stick it to the top of my building and connect to my base. The wood glue didn't work too well so I switched to hot glue which worked better I repeated this process around my structure because it would create texture around my whole structure which is what I wanted. After I put my textured paper all around my stump I cut a hole a opening in it to create the doorway for people to go in and out of. The last step was to add a bench inside of my rest stop so hikers could rest. I created the bench by cutting out a long thin piece of card board and bent it close to each of the end at a 90 degree angle. This would create my bench all I had to do then was put it in my stump. I put my bench in my stump by putting a little bit of wood glue on each end of the bench and sticking it in my stump. After I put my bench in my structure my tree stump rest stop mode4l was complete. Reflection Taking a look at how this project went I would say it was descent. I would say I succeed in some parts but also failed in other parts. The place I would say I was most successful in was the base because I feel like it represents where I imagined my model would go. Another part of this project I would say I succeed in was making the window because I feel it looked good because the plastic was able to be seen on the side of the stump. Making the window was the hardest part of this whole process but I feel liked it payed off because it looks like on of the best parts of this project. These is on big place I feel like I feel like I failed at and that is where the construction paper meets the window at the top of my tree truck. I feel like I failed in this place because the wood glue that I used to connect these two thing is visible at the top of the tree stump which I think it shouldn't. If I were to do this project again I would make sure that the glue was not visible because it would make the tree stump look better overall. Critique Looking at my art piece and inspiration The Truffle by ensemble there are many similarities and differences. The first similarity between these two artworks is the texture used in both of them. Both of these artworks use a rough texture throughout them to make them blend into the environment. Both of these pieces are also meant to blend in with the environment because they are supposed to show how humans can interact with the environment in a positive way. Another similarity between these two pieces is they have big windows in them so people who are on the inside can see the environment around them. The first difference between these two artworks is that one is used for long term reasons and the other is used for short term reasons. The Truffle by ensemble studio is meant to be used for people to spend the night in while mine is supposed to be used to sit in for a few minutes. Experimentation With this artwork I experimented with many things because I used materials that have also experimented with how to connect them together. The first thing I experimented with was how to make the window. I first started by just putting the plastic on top with one of my models which I didn't like how it looked. On the final model I put the plastic bet between two pieces of card stock prices which made it look better because the edges of the plastic couldn't be seen. Another thing I experimented with was how to connect my construction paper and the card stock when texturing my tree stump. I started to connect the construction paper to the card stock with wood glue but the wood glue wasn't strong enough to wrap around the card stock. This is why I switched to hot glue which was much stronger and held on to the construction paper and the card stock better than the wood glue. The last thing I experimented with was the base of the project. I experimented with this because I have never made any base that is layered on top of itself. In one of my older models I put the white part which represented the path above the brown but I didn't like how that looked because in real life the path was on a lower level than the brown. That is why in my final project I put the white part below the brown which I believed turned out very well and how I wanted to. ACT Questions Clearly explain how you are able to identify the cause effect relationship between your inspiration and its effect on your artwork. My inspiration caused many parts of my project including the texture on the outside of the structure and how it connects to the environment which makes it blend in. What is the overall approach the author has regarding the topic of your inspiration? Ensemble studio approached The Truffle by connecting it to the environment and how humans can live with the environment without destroying it, What kind of generalizations and conclusions have you discovered about people, ideas, culture, etc. while you researched your inspiration? The generalization that is drawn the most from my inspiration is that people destroy the environment and don't know what resources they are losing while doing it. What is the central idea or theme around your inspirational research? When I was researching my inspiration I found out that this structure was created to blend the difference between what was man made and what was created by nature. What kind of inferences did you make while reading your research? When I was looking at what the goals Ensemble Studio was going for I found out how much they cared about the environment and how they are trying to represent it with this structure. MLA Citation Saieh, Nico. “The Truffle / Ensamble Studio.” ArchDaily, ArchDaily, 26 Apr. 2010, www.archdaily.com/57367/the-truffle-ensamble-estudio. designboom, andrea chin I. “Ensamble Studio: The Truffle.” Designboom, 30 May 2016, www.designboom.com/architecture/ensamble-studio-the-truffle/. Saieh, Nico. “The Truffle / Ensamble Studio.” ArchDaily, ArchDaily, 26 Apr. 2010, www.archdaily.com/57367/the-truffle-ensamble-estudio. |